I have been working on a lot of side projects lately. My latest thing I am going to be working on is a React Native app with push notifications using Google Cloud’s Firebase Cloud Messaging.
Before I do anything with that though, I need to get my development environment going. I have been using VSCode for a while now with Arduino and for some Python work on Rapsberry Pi so I would like to stick to using that. I also want to use Windows Subsystem for Linux since this has basically been the best thing that has happened to Windows in a long time.
Install WSL
First thing you need to do is install Windows Subsystem for Linux following the instructions from Microsoft:
https://docs.microsoft.com/en-us/windows/wsl/install-win10
You might need to enable the windows subsystem for linux as well. Open a powershell and run the following command:
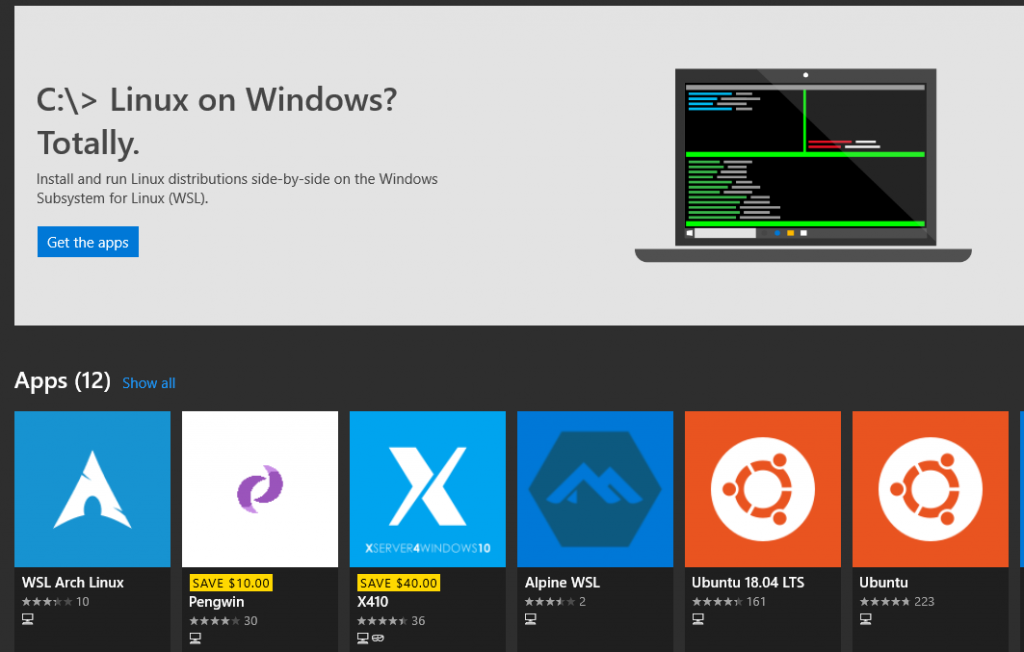
Enable-WindowsOptionalFeature -Online -FeatureName Microsoft-Windows-Subsystem-LinuxPick whatever flavor of linux you want from the Microsoft Store, I chose Ubuntu LTS because I like Ubuntu, it’s very well documented and long term support helps with consistency over time.
After you have installed it launch it for the first time and complete the setup as instructed. After that you should do a full update. Get a coffee while that happens…
sudo apt-get update
sudo apt-get upgrade
Install VSCode
After the installation is complete time to install VSCode. You can get that directly from Microsoft:
https://code.visualstudio.com/download
After we have installed VSCode, launch it for the first time. You might get some errors, ignore them for now. A nice but somewhat unknown feature about VSCode with WSL is that if you run VSCode from within WSL (with the command “code”) it will actually launch the native Windows executable.
You will also want to install the VSCode Remote Development extension pack from Microsoft. This pack will let your VSCode directly integrate with the files in WSL without confusing their format with Windows format for files.
Install Git for Windows
Since we want to work with source control on this project (as there will be a lot of moving parts) we need to install Git for windows.
Install it, these are the settings I used:
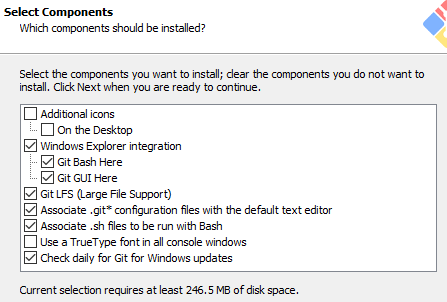
I also selected a few additional options:
- Use Visual Studio Code as Git’s default editor
- Use git from the command line and also from 3rd-party-software
- Use OpenSSH (comes with Git)
- Use the OpenSSL library
- Checkout as-is, commit Unix-style line endings (allows WSL to work properly)
- Use Windows’ default console window.
- Enable file system caching
- Enable Git Credential Manager
Configure VSCode for Bash and Git compatibility
Once the installation is complete, launch VSCode and open your settings.json file. Add the following line to change your integrated terminal from Powershell to native Bash:
"terminal.integrated.shell.windows": "C:\\WINDOWS\\sysnative\\bash.exe"Restart VSCode and open the termianl bash should launch as your native shell. An important thing to note is, your bash prompt should look something like this:
<username>@<hostname>:/mnt/c/Users/<winusername>This is a critical change to understand, when you are dealing with paths in windows they look like this:
C:\Users\<winusername>\But that translates into this:
/mnt/c/Users/<winusername>$This is your mounted C drive. So if you are keeping your files in:
C:\Users\Dude\Documents\Project1You get to that folder by:
cd /mnt/c/Users/Dude/Documents/Project1 From this directory, I create/clone projects. Then using Bash, I cd into those directories and npm install / bundle install whatever I need. Each subdirectory acts as its own project folder. Each of these can be committed to git or branched/updated differently.
Configure WSL
We installed Git for Windows but we should also add Git into our WSL then we can work in Bash in VSCode and work from within our WSL as well (omit –global and cd to project directory to set this as specific to a project)
sudo apt install git
git config --global user.email "you@example.com"
git config --global user.name "Your Name"
git config --global core.autocrlf input
The crlf setting is important, it causes Git to change a carriage return line feed to a linux compatible line feed. This makes sure all your code and installations don’t break. It’s important.
Quick reminder of the workflow to build a new git repository (most of this information comes from the simple guide to git)
http://rogerdudler.github.io/git-guide/
"From within your new project directory"
git init
"Do some work, add some files"
git add *
git commit -m "Commit message"
Now log into github and create a repository that matches the project folder name you chose for this new project, set it to public or private and initialize with a README if desired. Git will then give you the appropriate commands to upload your repository:
git remote add origin https://github.com/<account name>/NewRepository.git
git push -u origin master
Git will ask for your username and password and then push the code into the github repository.
Now install other tools you need like Python, Node, etc. Since we are working on React Native, we are going to install a couple different tools.
Configure environment for React Native Development
Perform all of these installations in your WSL window not from the native bash shell in VSCode. These instructions are based on the linux installation instructions from React Native’s Facebook github.
https://facebook.github.io/react-native/docs/getting-started
First we have to install Node.js, which turns out is not super easy. Regardless, follow the instructions here:
https://github.com/nodesource/distributions/blob/master/README.md#deb
Execute these commands for the latest version of node at this time, v12.x
# Using Ubuntu
curl -sL https://deb.nodesource.com/setup_12.x | sudo -E bash -
sudo apt-get install -y nodejs
Next we install the React Native CLI, installing Node gave us the Node Package Manager npm which allows us to install further versions of Node and Node supporting code. So now we install the React Native CLI
sudo npm install -g react-native-cli After that we install the default JDK
sudo apt install default-jdkAt the time of writing the latest version of java is 1.8, so you should get the following output from the “java -version” command
openjdk version "1.8.0_212"
OpenJDK Runtime Environment (build 1.8.0_212-8u212-b03-0ubuntu1.16.04.1-b03)
OpenJDK 64-Bit Server VM (build 25.212-b03, mixed mode)
Now to extend the functionality of the WSL we want to install an Xterm system in windows. The one I have tested is MobaXTerm which you can find here:
https://mobaxterm.mobatek.net/
Download and install the home edition for windows. This will be required to launch any sort of graphical development component from WSL. So depending on your workflow and what you are developing you may or may not need to install this part. Once it is installed you will need to set your DISPLAY variable in WSL.
Navigate to your home director and edit your .profile file. At the end of the file you will want to add the following line:
export DISPLAY=:0Now save the file and exit your linux and restart it. Now your DISPLAY is exported to the primary display on your workstation and combined with MobaXTerm this will allow graphical users interfaces to launch through your WSL. Your linux subsystem will require some extra files to make that happen though so to do that you should run the following install:
sudo apt-get install libgtk2.0-0 libxss1 libasound2
sudo apt-get -f install
Now we are going to install Android Studio within WSL to give us the full Android tools. You could actually install just the command line tools and packages, but I want to experiment with the whole suite. Download the linux distribution for your version of linux at the follow link
https://developer.android.com/studio/index.html#downloads
With your xterm running from within your WSL follow the linux installation instructions for installing Android Stuido:
https://developer.android.com/studio/install#linux
I installed android studio into /usr/local, and because it is a .sh script just adding it to your path won’t work easily. So, going oldschool here and adding a simlink to /usr/local/bin back to it to spoof an executable.
cd /usr/local/bin
sudo ln -s /usr/local/android-studio/bin/studio.sh studio
(May 20, 2019 – Unfortunately KVM on WSL still isn’t possible. I will keep trying this in the future. I have left this part of the documentation in for that time, but you can jump ahead to Build your first Application. Might try Vagrant as well and use it within WSL to push to external KVM server
https://char.gd/blog/2017/how-to-set-up-the-perfect-modern-dev-environment-on-windows WSL 2 will fix this issue.)
We will probably want to install KVM for increased performance as per Android Studio’s recommendations. For our version of Ubuntu the instructions are below:
https://linuxconfig.org/install-and-set-up-kvm-on-ubuntu-18-04-bionic-beaver-linux
The listed instructions don’t work exactly with WSL so I modified the installation (excluding libvirt-clients) to the following command:
sudo apt install qemu-kvm libvirt-daemon-system bridge-utils virt-managerOnce the installation is complete, we need let Ubuntu know that you are going to share your Ethernet connection using a bridge. This will require discovering which ethX interface you are using for your primary network. Run a “ifconfig -a” and find the ethX entry with the same IP as your primary network connection in Windows. Once you have found that, edit your /etc/network/interfaces file and add the following lines (our example uses eth1):
iface eth1 inet manual

iface br0 inet dhcp
        bridge_ports eth1
Build your first Application
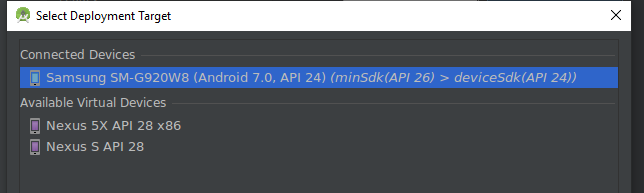
Once you have walked through the install Android Studio will launch for the first time. Create a new basic application and open it. That will cause Android Studio to download and install the latest version of gradle and integrate it with your development environment. Once that is complete it will complete a build of your test application. After that you can setup a physical deployment target for testing. This is a bit tricky!
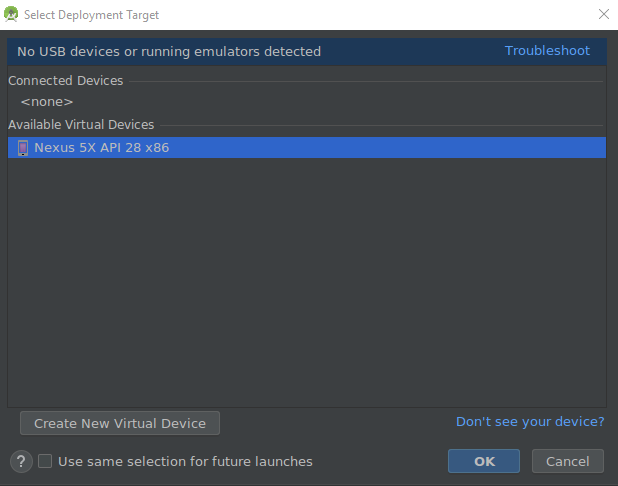
As you can see above, no connected devices are showing. You can get this to work but in a non-intuitive way. To connect to a physical device android studio relies on Android Debug Bridge (adb) and the version of adb needs to exactly match in both WSL and in Windows.
You can check the version in both shells using the command “adb version”. It might not work immediately in powershell and you may have to add it to your path. What you will likely find is that the version in your powershell and the one in WSL are not the same. They need to be the exact same version.


My Linux version was not the latest and the package installed through apt-get universe was not the latest, so I had to manually install the latest and change those executables in /usr/local/bin
wget https://dl.google.com/android/repository/platform-tools-latest-linux.zip
sudo unzip -d /usr/local/sbin platform-tools-latest-linux.zip
sudo mv platform-tools /usr/local/
cd /usr/local/bin
sudo mv adb .off.adb
sudo mv fastboot .off.adb
sudo ln -s /usr/local/platform-tools/adb adb
sudo ln -s /usr/local/platform-tools/fastboot fastboot
At this point my Linux version of adb was reporting 1.0.41
I wound up having to install the package manager Chocolatey
https://chocolatey.org/ and using that to manage the versions of ADB in powershell. This command installed Chocolatey from within an Administrator Powershell
Set-ExecutionPolicy Bypass -Scope Process -Force; iex ((New-Object System.Net.WebClient).DownloadString('https://chocolatey.org/install.ps1'))Then I restarted my powershell and installed the correct (latest) version of adb using this command:
choco uninstall adb
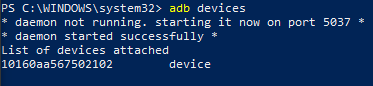
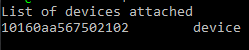
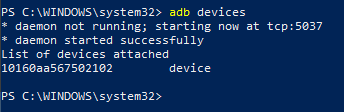
choco install adbOnce those versions match, you can shut down the adb server in WSL using the command “adb kill-server” and you can start the adb server in powershell by calling “adb devices” Which should list your attached android device (as long as Developer tools are unlocked and you have allowed access on the Android device). If you run the adb version command in WSL you should see the exact same output for your device.
Now you can compile and run your app in Android studio to the connected device. I will keep trying to make WSL work but this is a reasonable way to test using WSL as your entire development environment.
Interestingly, the windows native BASH shell in VSCode inherits all the configuration we have done above too. That means, from within VSCode you can launch android studio from the terminal, you can use react native cli, manage all your source through Git, and you can use any other linux subsystem tools that you install, all through VSCode.
Configure to build React Native Applications.
First thing we should do is install a couple supporting packages. Specifically yarn (execute these lines, 1 at a time):
curl -sL https://dl.yarnpkg.com/debian/pubkey.gpg | sudo apt-key add -

echo "deb https://dl.yarnpkg.com/debian/ stable main" | sudo tee /etc/apt/sources.list.d/yarn.list

sudo apt-get update

sudo apt-get install yarn
Now we have to set up some environment variables for React Native to work in our WSL environment. Add these lines to your $HOME/.profile
export ANDROID_HOME=$HOME/Android/Sdk
export PATH=$PATH:$ANDROID_HOME/emulator
export PATH=$PATH:$ANDROID_HOME/tools
export PATH=$PATH:$ANDROID_HOME/tools/bin
export PATH=$PATH:$ANDROID_HOME/platform-tool
Once these variables have been added you can execute “source $HOME/.profile” and “echo $PATH” to verify the variables have been added to your executable environment.
Creating your first React Native app
Now that everything is set up you can move into your development directory and start a brand new project by typing the following command:
react-native init <Project Name Here>This will kick off creation of a project folder and the automated download of all required libraries etc. There may be warnings about core packages being out of date or missing dependencies. These appear to be safely ignored (I might learn otherwise as I start building more react native apps!).
Assuming that everything installed correctly and your test device is properly connected and visible from Android Studio as shown earlier you can now execute your react native project with the following commands.
cd NewProject
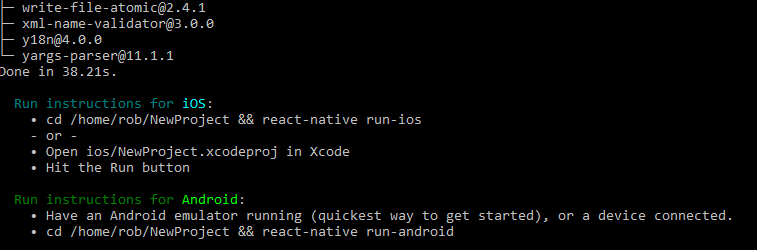
react-native run-androidThis should fire up a JS server, kick off a multi-threaded build, the first time it may take a while, after it is fast.
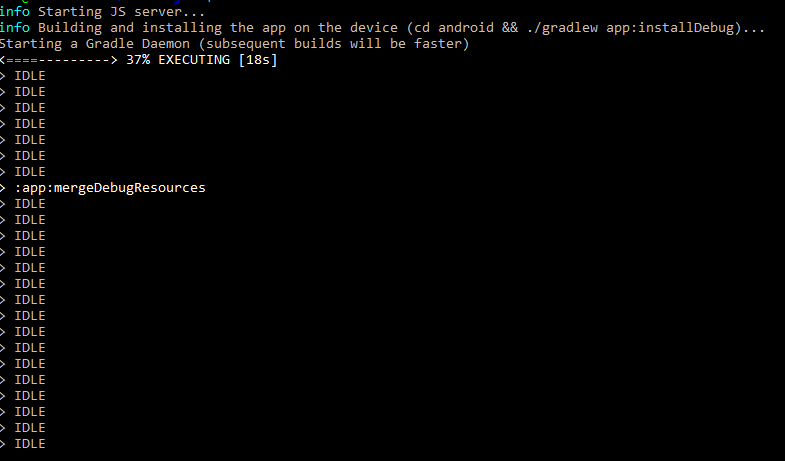
If the build fails, make certain ADB in PowerShell is running the daemon for USB devices and not the one in WSL.
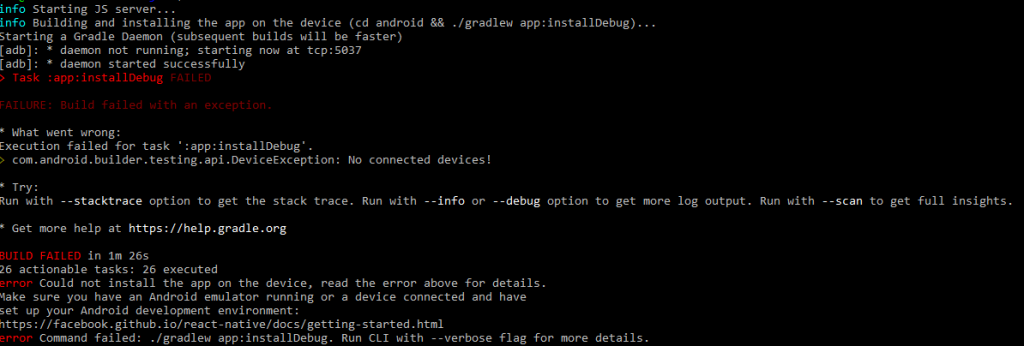
Once that is corrected, run the react-native run-android command again. This time you should be greeted with (If it returns to a prompt, the app won’t run properly, RN should be running in the shell):

And on your device:
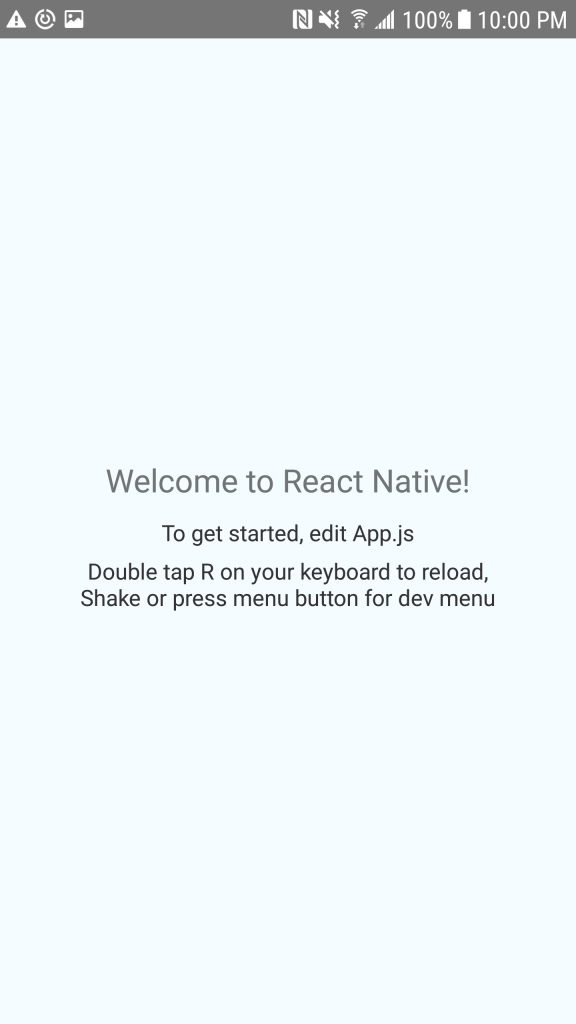
Congratulations! You have just built your very first application in React Native on WSL using VSCode for all your development. Now go drink a stiff drink, that was a lot of work.