Now that we have our new WSL only development environment in VSCode we can extend our developers environment to support a Google Cloud Platform back-end. The side project I am working on is hosted in GCP so it’s natural to extend our environment to support this. In another article we will create a React Native application to listen for Firebase Cloud Messages in GCP.
This deployment follows the instructions located on GCP’s website linked here for the latest version:
That command executes a full installation of the Google Cloud SDK, I tried the apt-get install first but it wound up not working as it couldn’t find certain packages in the repository. First thing the script will ask you for is the base directory for your package installation, which in my case I chose the default /home/<username>
That means from now on, your most recent version of the Google Cloud SDK files will be located in:
/home/<username>/google-cloud-sdk
This doesn’t exactly match where our React Native project files will be or the location of our android SDK path. So it’s important to note. It makes sense to install here however as the SDK tools are really only for your specific project and the specific cloud access you need.
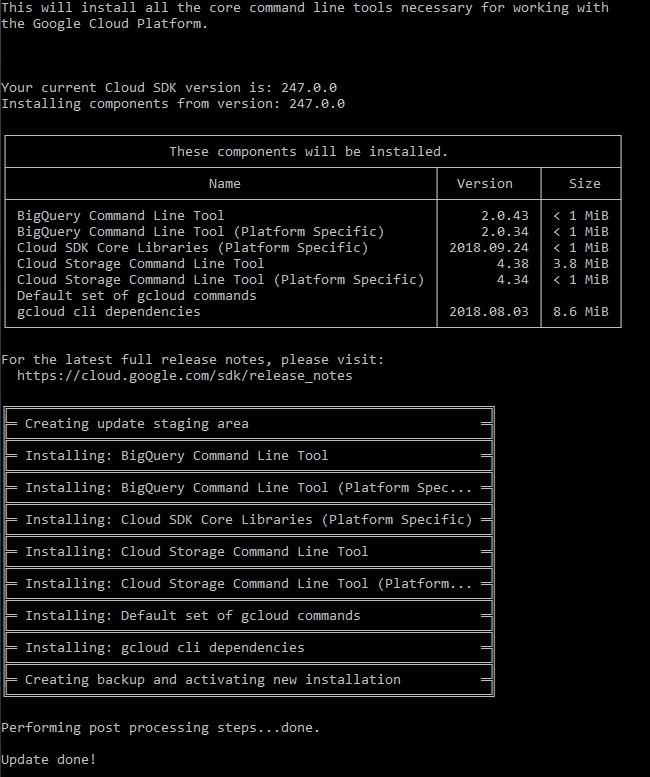
The script then proceeds to download all the appropriate files and code, asks if you want to contribute your anonymous data for error reporting and then kicks off the install.
Once the installation is complete the installer will ask if you would like your PATH modified to enable shell command completion, I recommend this.
Accept the default file for this if it is your current .rc file and then restart your WSL instance.
You should be good to go now! You can test it out in a new project folder by typing:
gcloud init
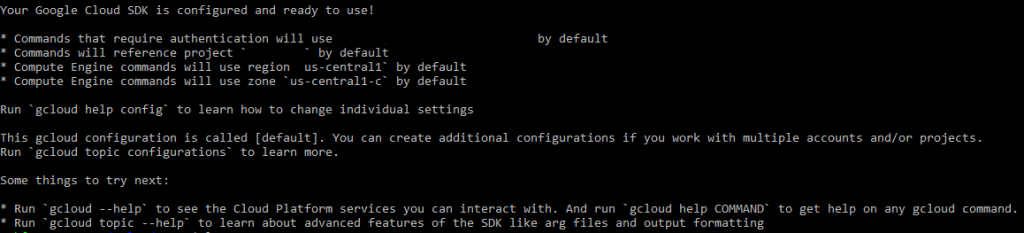
The script will take you through several steps to link your SDK to google cloud platform, including authenticating to your GCP account, what cloud project you are using and what default compute engine zone you would like to use. Once that is complete you should get a message similar to this:
Congratulations, you are now linked to Google Cloud Platform!
I have been working on a lot of side projects lately. My latest thing I am going to be working on is a React Native app with push notifications using Google Cloud’s Firebase Cloud Messaging.
Before I do anything with that though, I need to get my development environment going. I have been using VSCode for a while now with Arduino and for some Python work on Rapsberry Pi so I would like to stick to using that. I also want to use Windows Subsystem for Linux since this has basically been the best thing that has happened to Windows in a long time.
Install WSL
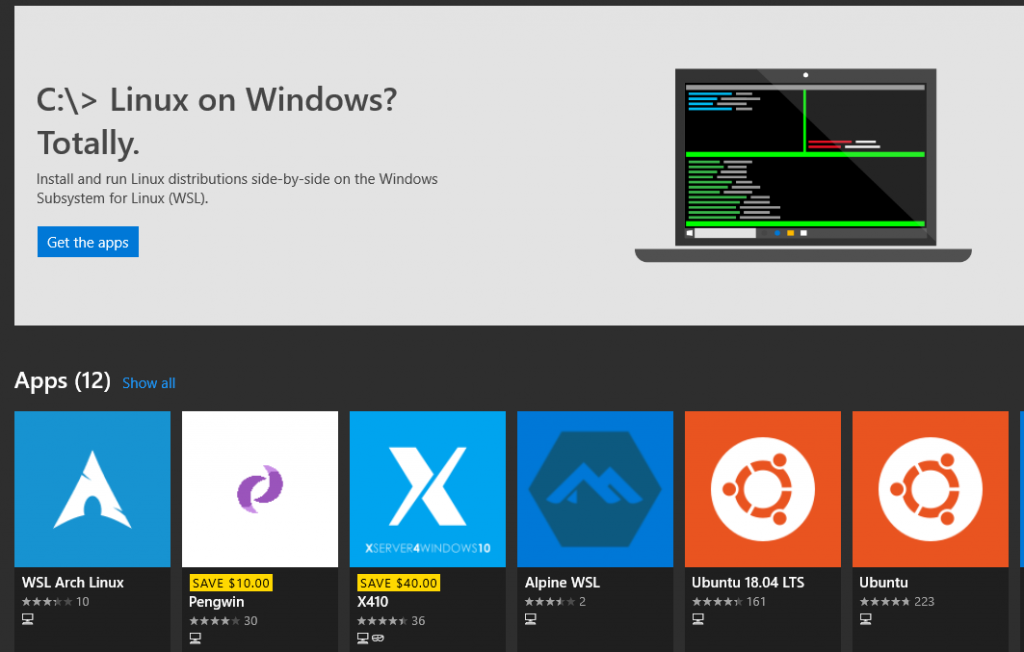
First thing you need to do is install Windows Subsystem for Linux following the instructions from Microsoft:
Pick whatever flavor of linux you want from the Microsoft Store, I chose Ubuntu LTS because I like Ubuntu, it’s very well documented and long term support helps with consistency over time.
After you have installed it launch it for the first time and complete the setup as instructed. After that you should do a full update. Get a coffee while that happens…
sudo apt-get update
sudo apt-get upgrade
Install VSCode
After the installation is complete time to install VSCode. You can get that directly from Microsoft:
After we have installed VSCode, launch it for the first time. You might get some errors, ignore them for now. A nice but somewhat unknown feature about VSCode with WSL is that if you run VSCode from within WSL (with the command “code”) it will actually launch the native Windows executable.
You will also want to install the VSCode Remote Development extension pack from Microsoft. This pack will let your VSCode directly integrate with the files in WSL without confusing their format with Windows format for files.
Install Git for Windows
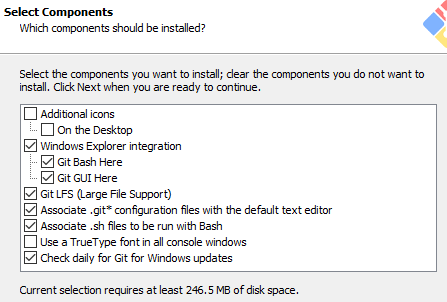
Since we want to work with source control on this project (as there will be a lot of moving parts) we need to install Git for windows.
Use git from the command line and also from 3rd-party-software
Use OpenSSH (comes with Git)
Use the OpenSSL library
Checkout as-is, commit Unix-style line endings (allows WSL to work properly)
Use Windows’ default console window.
Enable file system caching
Enable Git Credential Manager
Configure VSCode for Bash and Git compatibility
Once the installation is complete, launch VSCode and open your settings.json file. Add the following line to change your integrated terminal from Powershell to native Bash:
Restart VSCode and open the termianl bash should launch as your native shell. An important thing to note is, your bash prompt should look something like this:
<username>@<hostname>:/mnt/c/Users/<winusername>
This is a critical change to understand, when you are dealing with paths in windows they look like this:
C:\Users\<winusername>\
But that translates into this:
/mnt/c/Users/<winusername>$
This is your mounted C drive. So if you are keeping your files in:
C:\Users\Dude\Documents\Project1
You get to that folder by:
cd /mnt/c/Users/Dude/Documents/Project1
From this directory, I create/clone projects. Then using Bash, I cd into those directories and npm install / bundle install whatever I need. Each subdirectory acts as its own project folder. Each of these can be committed to git or branched/updated differently.
Configure WSL
We installed Git for Windows but we should also add Git into our WSL then we can work in Bash in VSCode and work from within our WSL as well (omit –global and cd to project directory to set this as specific to a project)
The crlf setting is important, it causes Git to change a carriage return line feed to a linux compatible line feed. This makes sure all your code and installations don’t break. It’s important.
Quick reminder of the workflow to build a new git repository (most of this information comes from the simple guide to git)
"From within your new project directory"
git init
"Do some work, add some files"
git add *
git commit -m "Commit message"
Now log into github and create a repository that matches the project folder name you chose for this new project, set it to public or private and initialize with a README if desired. Git will then give you the appropriate commands to upload your repository:
Git will ask for your username and password and then push the code into the github repository.
Now install other tools you need like Python, Node, etc. Since we are working on React Native, we are going to install a couple different tools.
Configure environment for React Native Development
Perform all of these installations in your WSL window not from the native bash shell in VSCode. These instructions are based on the linux installation instructions from React Native’s Facebook github.
Next we install the React Native CLI, installing Node gave us the Node Package Manager npm which allows us to install further versions of Node and Node supporting code. So now we install the React Native CLI
sudo npm install -g react-native-cli
After that we install the default JDK
sudo apt install default-jdk
At the time of writing the latest version of java is 1.8, so you should get the following output from the “java -version” command
openjdk version "1.8.0_212"
OpenJDK Runtime Environment (build 1.8.0_212-8u212-b03-0ubuntu1.16.04.1-b03)
OpenJDK 64-Bit Server VM (build 25.212-b03, mixed mode)
Now to extend the functionality of the WSL we want to install an Xterm system in windows. The one I have tested is MobaXTerm which you can find here:
Download and install the home edition for windows. This will be required to launch any sort of graphical development component from WSL. So depending on your workflow and what you are developing you may or may not need to install this part. Once it is installed you will need to set your DISPLAY variable in WSL.
Navigate to your home director and edit your .profile file. At the end of the file you will want to add the following line:
export DISPLAY=:0
Now save the file and exit your linux and restart it. Now your DISPLAY is exported to the primary display on your workstation and combined with MobaXTerm this will allow graphical users interfaces to launch through your WSL. Your linux subsystem will require some extra files to make that happen though so to do that you should run the following install:
Now we are going to install Android Studio within WSL to give us the full Android tools. You could actually install just the command line tools and packages, but I want to experiment with the whole suite. Download the linux distribution for your version of linux at the follow link
I installed android studio into /usr/local, and because it is a .sh script just adding it to your path won’t work easily. So, going oldschool here and adding a simlink to /usr/local/bin back to it to spoof an executable.
cd /usr/local/bin
sudo ln -s /usr/local/android-studio/bin/studio.sh studio
(May 20, 2019 – Unfortunately KVM on WSL still isn’t possible. I will keep trying this in the future. I have left this part of the documentation in for that time, but you can jump ahead to Build your first Application. Might try Vagrant as well and use it within WSL to push to external KVM server https://char.gd/blog/2017/how-to-set-up-the-perfect-modern-dev-environment-on-windowsWSL 2 will fix this issue.)
We will probably want to install KVM for increased performance as per Android Studio’s recommendations. For our version of Ubuntu the instructions are below:
Once the installation is complete, we need let Ubuntu know that you are going to share your Ethernet connection using a bridge. This will require discovering which ethX interface you are using for your primary network. Run a “ifconfig -a” and find the ethX entry with the same IP as your primary network connection in Windows. Once you have found that, edit your /etc/network/interfaces file and add the following lines (our example uses eth1):
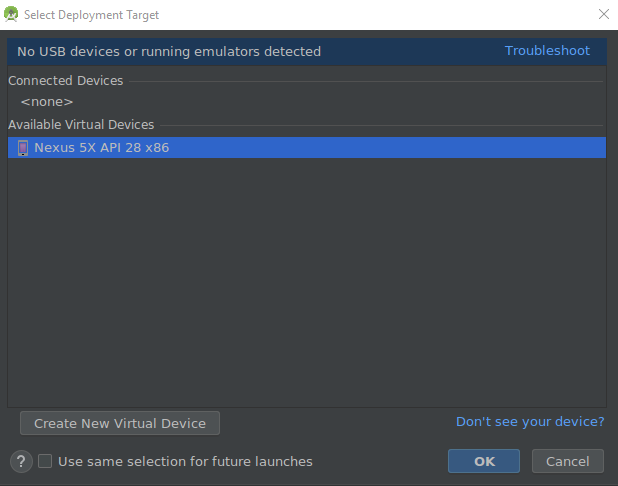
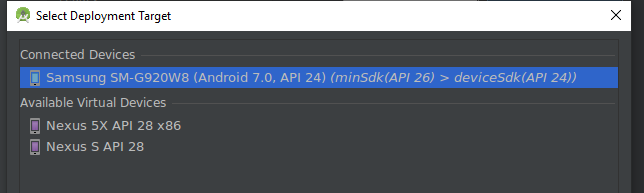
Once you have walked through the install Android Studio will launch for the first time. Create a new basic application and open it. That will cause Android Studio to download and install the latest version of gradle and integrate it with your development environment. Once that is complete it will complete a build of your test application. After that you can setup a physical deployment target for testing. This is a bit tricky!
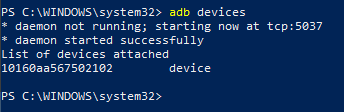
As you can see above, no connected devices are showing. You can get this to work but in a non-intuitive way. To connect to a physical device android studio relies on Android Debug Bridge (adb) and the version of adb needs to exactly match in both WSL and in Windows.
You can check the version in both shells using the command “adb version”. It might not work immediately in powershell and you may have to add it to your path. What you will likely find is that the version in your powershell and the one in WSL are not the same. They need to be the exact same version.
My Linux version was not the latest and the package installed through apt-get universe was not the latest, so I had to manually install the latest and change those executables in /usr/local/bin
At this point my Linux version of adb was reporting 1.0.41
I wound up having to install the package manager Chocolatey https://chocolatey.org/ and using that to manage the versions of ADB in powershell. This command installed Chocolatey from within an Administrator Powershell
Set-ExecutionPolicy Bypass -Scope Process -Force; iex ((New-Object System.Net.WebClient).DownloadString('https://chocolatey.org/install.ps1'))
Then I restarted my powershell and installed the correct (latest) version of adb using this command:
choco uninstall adb
choco install adb
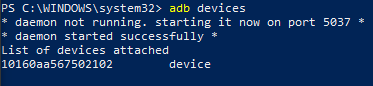
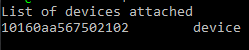
Once those versions match, you can shut down the adb server in WSL using the command “adb kill-server” and you can start the adb server in powershell by calling “adb devices” Which should list your attached android device (as long as Developer tools are unlocked and you have allowed access on the Android device). If you run the adb version command in WSL you should see the exact same output for your device.
Now you can compile and run your app in Android studio to the connected device. I will keep trying to make WSL work but this is a reasonable way to test using WSL as your entire development environment.
Interestingly, the windows native BASH shell in VSCode inherits all the configuration we have done above too. That means, from within VSCode you can launch android studio from the terminal, you can use react native cli, manage all your source through Git, and you can use any other linux subsystem tools that you install, all through VSCode.
Configure to build React Native Applications.
First thing we should do is install a couple supporting packages. Specifically yarn (execute these lines, 1 at a time):
Once these variables have been added you can execute “source $HOME/.profile” and “echo $PATH” to verify the variables have been added to your executable environment.
Creating your first React Native app
Now that everything is set up you can move into your development directory and start a brand new project by typing the following command:
react-native init <Project Name Here>
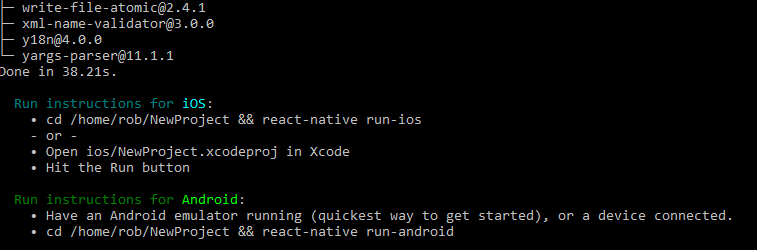
This will kick off creation of a project folder and the automated download of all required libraries etc. There may be warnings about core packages being out of date or missing dependencies. These appear to be safely ignored (I might learn otherwise as I start building more react native apps!).
Assuming that everything installed correctly and your test device is properly connected and visible from Android Studio as shown earlier you can now execute your react native project with the following commands.
cd NewProject
react-native run-android
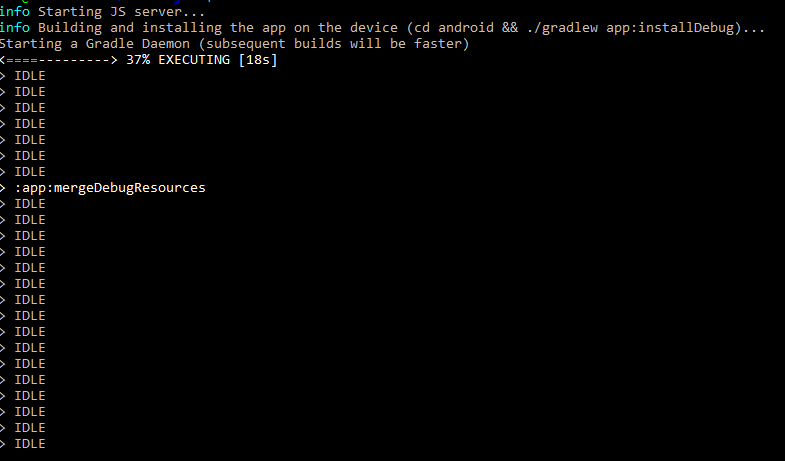
This should fire up a JS server, kick off a multi-threaded build, the first time it may take a while, after it is fast.
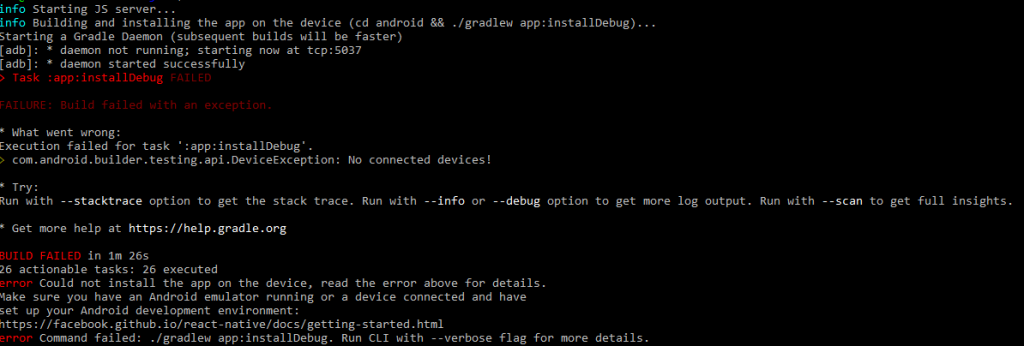
If the build fails, make certain ADB in PowerShell is running the daemon for USB devices and not the one in WSL.
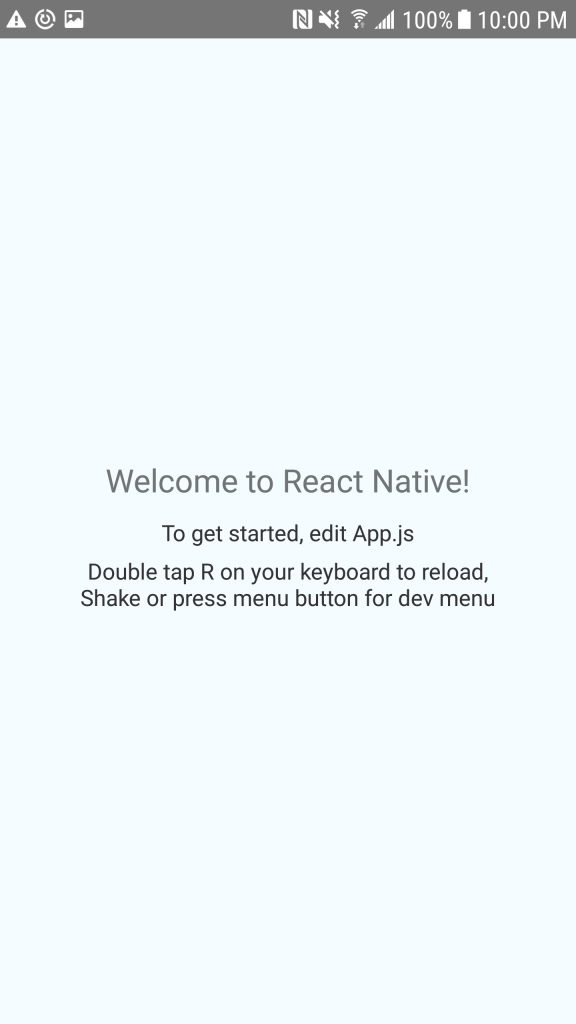
Once that is corrected, run the react-native run-android command again. This time you should be greeted with (If it returns to a prompt, the app won’t run properly, RN should be running in the shell):
And on your device:
Congratulations! You have just built your very first application in React Native on WSL using VSCode for all your development. Now go drink a stiff drink, that was a lot of work.
So sometimes when you are working on some code, you like to write a little bit of debugging code and build it into your system so you can confirm that a component is working as it should.
I had built such a piece of code to be certain that the artificial neural networks we use as phenotypes are consistent between generations. The code confirmed that structurally they were consistent and that their output is consistent after one step of evaluation. The first evaluation of the reformed network has not propagated through the network completely and consequently the very first set of outputs of your neural network are not as precise as they were in the previous generation. The second evaluation puts the neural network back to its original normal state. In a future iteration of the system I plan to initialize the networks once before they are placed in an evaluation environment eliminating this slight variation.
Having said all that, the code that verified these phenomes itself had an error. An errant semi-colon was placed at the end of an if-statement which forced the debug code to run for all NEAT experiments instead of just NEATforXOR experiments.
The bug has been fixed and all the downloads on the Neuroevolutionary Solver page have been updated with correct versions of the code.
What happens when you work a full time job, get lots of overtime at work and have a major deadline in your thesis work that requires you to code your butt off? You get a breakdown in the amount of cool blog posts you get to put up.
I am working out some loose ends in my integration of NEAT into PicoEvo and Simbad. I am to the point where I have to integrate the genetic operators and the evolution epoch into the algorithm and putting it together the right way is tricky. I suspect I will wind up just slamming it together so it works then I can pull it apart and put it back together the right way after I meet my deadline!
When I really started working on my research several months ago, I started bringing environments together and testing various technologies out and trying to find the right combination of tools for my work. I could have written my own completely but that would have taken far more time and there’s no need to reinvent the wheel. The first tool I went looking for was a virtual robot simulator. There are many tools out there I won’t go over them, but I eventually settled on Simbad (I have included the link to the right). It was a nicely coded, 3d robot simulator. It is easily extensible and written in Java, a language I am comfortable with. So this worked for me.
I won’t talk about all the other tools I am using. I am going to leave that for a history page. What I will do is talk about my very first problem I ran into with the Simbad simulator. This problem made me so angry, I spent a week on it. I tried variations in my code, researched what others had done, read through multiple texts I purchased as a teenager about 3d graphics programming. This problem is directly responsible for me wanting to blog my work.
I needed to make dumb agents (robots) that can turn towards their goal and walk toward it in a straight line.
Sounds easy right? It wasn’t so easy for me. These dumb agents have to behave in a believable way, almost as if they were humans walking in a hallway or busy room. They are required to simulate a training environment for my learning agents. This task seems simple for you and I, but for a dumb robot it is quite diffcult.
I first had to add some ability to the agents to know where a goal is in their environment. That is simple enough, give them a goal point in the world and the means to check their own location in the world. This is the kind of thing we can do with GPS today, so it is fine if a wanna-be-human robot can do it. As a human, how can you tell that you are pointing towards your goal? Well you can look at your compass and it will tell you if the direction is incorrect. That boils down to plotting a straight line from your point to the goal and checking to see if you are pointing parallel to that line. So now you know you are or aren’t going in the right direction which way do you turn to go in the right direction if you aren’t? Well you turn the shortest amount to parallel with the proper direction. But how do you know which way to turn and how if your direction is parallel to the line between you and your goal, how do you know you aren’t heading away from your goal? We relate our directions to North, but the dumb agents don’t really have that luxury.
To solve these problems you have to calculate the distance to goal. That way if your distance to goal is increasing you know you are going the wrong way and you should turn towards the goal. Which way to turn though? Did this even work? No, it didn’t work. The distance calculation comes in handy but it isn’t really a good judge of when to turn and what way to turn. Initially I just told the robot to turn right and if it detected it was getting further away from the goal to turn left. This is great until you are heading directly away from the goal. Then you hop back and forth between left and right turns and never achieve anything. Humans may do this, if they are drunk. Not what I need for my test environment.
So I started calculating the angle between my current position and the goal and what would be my next location and the goal. When these angles dropped below 0.1 radians I knew I was heading in the right direction and could just keep going that way. I still didn’t know what way was the shortest turn and I really couldn’t get the agent to turn completely towards its goal. It would walk in a big circle around its goal or it would meander towards its goal, the inaccuracy of calculating lines just wasn’t working. So I broke out the linear algebra texts and started reading. If you calculate the dot product you can tell if your angle to another point is acute or obtuse. That proved to be handy, I would only run into problems at the 90, 180 and 270 degree marks but if you test for all instances of the dot product and wrap some other logic around it, you can force the agents to turn completely towards their goal. Now we are getting somewhere, but they still always turn right.
Well after much googling I found this very handy tid-bit on a basic 2d graphics website (http://www.geocities.com/SiliconValley/2151/math2d.html) and I want to share this with you, because if anyone out there is feeling this problem like I did, this will make you very happy.
What this does is tell you that the graph that is formed between the last position, current position, and goal are formed in a clockwise or counter-clockwise order. So no matter where you are in the X,Y plane if this calculation is < 0 you want to turn counter-clockwise since the angle of the lines is clockwise and vice versa if it is > 0.
Implement these components in the right order accounting for the 90 degree and 180 degree marks and you will have a nice little robot that turns the shortest (and most human) way towards the goal every time and is very efficient about getting on track to goal even after being bumped out of the way.
That took me forever to get working, and it was just a simple little problem. It really made me want to talk about what I did to solve the problem and some of the thought process. Will it solve your problem? I don’t know, but I hope you enjoyed reading about my pain.