The axis of Artificial Intelligence (AI) training has traditionally spun around the acquisition and storage of colossal volumes of real-world data. This conventional approach, while effective, poses several challenges including storage costs, data privacy concerns, and the ecological footprint of data centers. However, the innovation of synthetic training data is ushering in a compelling alternative. Models such as Wayve’s GAIA-1 and platforms like the Universal Simulator (UniSim) are at the forefront of this transition, showcasing the ability to generate synthetic data for training AI models, potentially reducing the reliance on stored real-world data.
GAIA-1: A Forerunner in Synthetic Data Generation
Unveiled in June 2023, GAIA-1 emerged as a groundbreaking generative model aimed at enhancing the resolution of generated videos and improving the world model quality through larger-scale training. This 9-billion parameter generative world model is designed to offer a structured understanding of environmental dynamics, crucial for making informed decisions while driving. The model’s adeptness in accurately predicting future events is seen as a cornerstone for enhancing safety and efficiency on the roads, allowing autonomous vehicles to better anticipate and plan their actions in real-world scenarios.
UniSim: Bridging the Synthetic Data Gap
On another spectrum, the Universal Simulator (UniSim) project explores the potential of synthetic data in simulating realistic interactions between humans, robots, and other interactive agents. By emulating human and agent interactions with the world, UniSim provides a glimpse into a future where AI systems can be trained using generated data, eliminating the need for storing extensive real-world datasets. The simulator has shown promising results in training both high-level vision-language planners and low-level reinforcement learning policies, exhibiting significant transfer from training in a simulator to real-world scenarios.
The Speed of Data Generation Versus Ingestion
The remarkable pace at which synthetic data can be generated presents a nuanced challenge—the disparity between the rate of data generation and the rate of data ingestion for training purposes. The rapid generation of synthetic data may outpace the ability of AI models to process it in real-time. This scenario underscores the possible necessity for a caching mechanism to temporarily store generated data, ensuring a continuous and efficient training pipeline. While this doesn’t equate to the long-term storage of real-world data, it hints at a nuanced approach where temporary storage of generated data bridges the gap between generation and ingestion.
The Transition to Caching Generated Data
This rapid generation of synthetic data, although a boon, necessitates a strategy to address the lag in data ingestion rates. Caching emerges as a viable solution, acting as a conduit between data generation and data ingestion, ensuring a seamless training process. This approach, while not entirely eliminating the need for data storage, significantly reduces the volume of data that needs to be stored and managed over time.
Conclusion
The advancements in synthetic data generation as demonstrated by GAIA-1 and UniSim are redefining the landscape of AI training. The age-old practice of storing vast amounts of real-world data for training purposes might soon be eclipsed by more efficient, and scalable, synthetic data generation methodologies. The unfolding narrative in this domain is not only promising but indicative of a future where the training of AI systems is constrained only by the bounds of creativity, not storage capacity. The narrative around synthetic data resonates with the axiom—architecture matters. The pivot towards synthetic data underscores a significant architectural shift in AI training, which is bound to have a ripple effect across the broader spectrum of AI and machine learning domains.
Today we are going to set up a React Native test app from scratch using our dev environment we setup in the last post. Our goal is to configure React Native to receive messages from Firebase Cloud Messaging.
Open up a WSL shell and start in there.
First make sure you are in your development directory, check your path with pwd and then cd into your appropriate development directory. Something like:
/home/Username/develop
Be sure that you are in a /home workspace and not in the /mnt/c/ users space as we can run into file system complexity as discussed in the last article.Now that we are in our development directory we can setup a new React Native app like we did at the end of the last article here.
Run the command below inside of your VS Studio
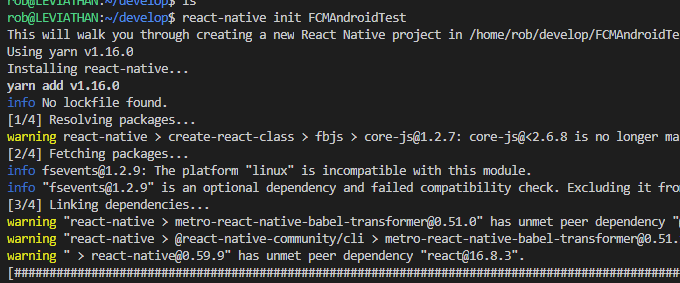
react-native init FCMAndroidTest
Which will kickoff a project creation
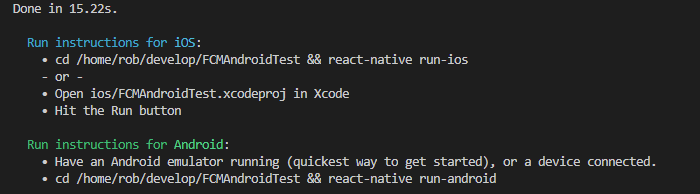
When completed you will get the following:
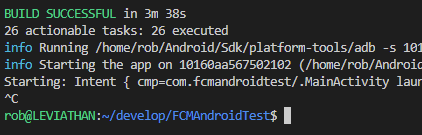
Make sure your adb server is running in Powershell and shows a device then switch into your new directory and run the app with react-native run-android. Your new test app should now be running, let’s shut down the react-native environment and begin integrating the other components now.
Integrate Firebase into our App
First thing we are going to do is add Firebase to our React Native project. Let’s go ahead and open the folder that we just created in our instance of VSCode. Just make sure you are in the root directory of the FCM project we just created in your WSL shell and type code . which should launch VSCode with the files opened.
Now from that same WSL shell run the studio command to open up an Android Studio we are going to check our pre-requisites for Firebase. (Make sure your xterm server is running).
Once it launches, close out whatever application opened with Android Studio and open the android stub folder of our FCMAndroidTest project. This should import the settings of the React Native project instead of Android Studio creating its own.
Open the build.gradle file for Project: FCMAndroidTest and check that the minimum SDK version is 16 or greater, and that we are compiling to the latest SDK version. Then open the gradle-wrapper.properties file and make certain our Gradle version is 4.1 or greater. These requirements come from the Add Firebase to your Android project page and may change over time. Refer to the link for the latest requirements.
They also ask that we use an Emulator image with google play active. Since we are developing to an actual device, this requirement is met. Now we are going to go ahead and add Firebase to our React Native test application.
Next open up your Firebase Console and add a new project or use one that you already have created. When we create this project we will have an opportunity to edit the Project ID which is unique and if a project is deleted this ID can never be used again.
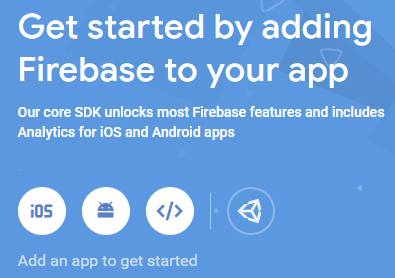
Now we need to add our android app to Firebase. We need to click on the Android icon in the Firebase console to launch the setup workflow.
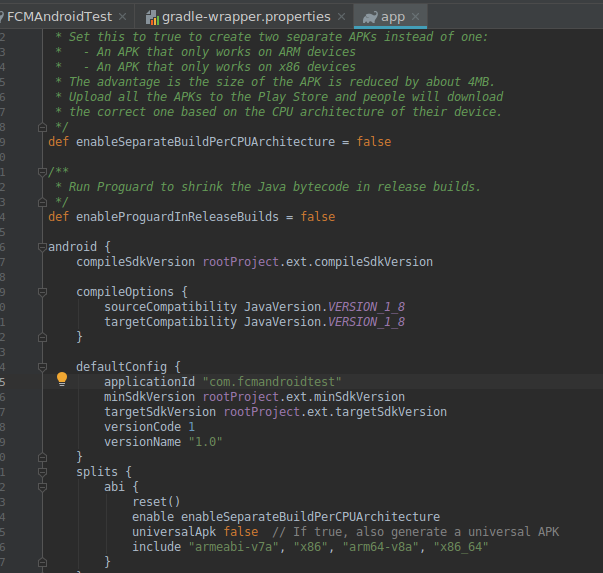
It’s going to ask you for your ApplicationID and an App nickname. You can give it whatever name you like, we went with FCMAndroidTestApp. The ApplicationID is specific your app that you already created. Open the app level version of your build.gradle file and find the line under your default config that defines the applicationID
In this case set your applicationID in Firebase to com.fcmandroidtest
Now the app has been registered with our project, we can download the google-services.json config file that has been created for our app. Remember we are still doing most of this work through Android Studio, switch to project view in Android Studio to see your project root directory and move the google-services.json file into your app root directory. Once the file has been copied in you can right click the app directory and resync it to see the file in the project explorer.
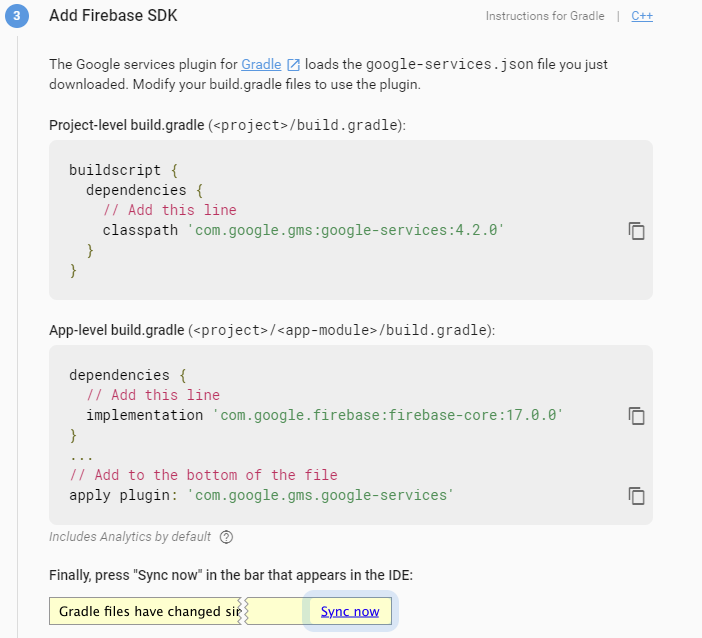
Now it’s time to add the Firebase SDK, we need to modify the build.gradle files to use the Google services plugin for Gradle.
Once those values have been added to the correct files you can go back to the WSL shell you have open and re-run your React Native app.
With the release of AndroidX, React Native is having a problem with translating native Java code to AndroidX. In order to allow React Native to be translated to AndroidX compatible code we need to add two lines to our gradle.properties file in the root of our android folder.
We skipped adding the optional components listed in the integration documentation as well as the AndroidManifest.xml service (we will add it in the next section). Your application may require them so do double check this requirement for your use case.
After that, our rebuild should work properly. If not you may need to install Jetify to scripts to allow for the code to compile. We will do this later in the next section when it is required. Congrats, we have now added Firebase to our app and linked it to our Firebase project.
Setup FCM in our Android App
Now we are going to setup FCM in our Android App. First we just need to double check that our test device does have the Google Play Store installed and updated and check the version (ours was 15.0.90), as well as the device running Android 4.1 or higher. These instructions are a mixture from several documentation pages:
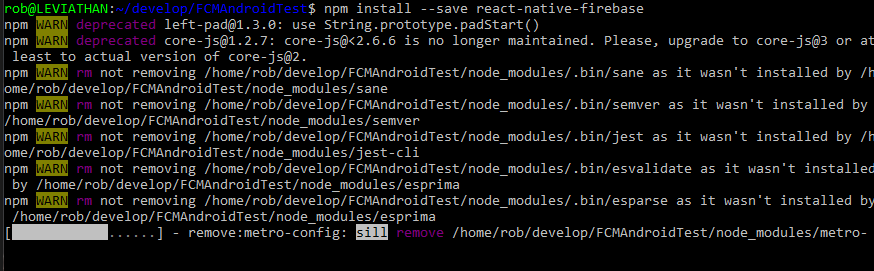
First we are going to install the React Native Firebase plugin which will allow us to quickly integrate the the Firebase SDK with our React Native application. Why re-invent the wheel right? At the time of writing version 6 of this library doesn’t support FCM fully so we are going to integrate the latest 5.x.x version. Install with the following command:
npm install --save react-native-firebase
This will kick off the installation process.
When complete you will get output similar to this:
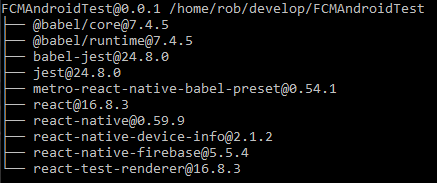
We can now run the command npm list –depth=0 to double check the version installed wasn’t v6 (not supporting messaging yet). We can see in the below screenshot that 5.5.4 was installed correctly.
Now we can run react-native link to integrate our packages into the project.
At this point we are going to make multiple changes to multiple files. I am going to combine all the changes into edits for each specific file. If you were walking through the individual installation instructions you would revisit these files multiple times. This way we will integrate multiple components at once. Open the following files:
In MainApplication.java we are going to integrate the following blocks of code:
import io.invertase.firebase.RNFirebasePackage; //<-- Add this line
import io.invertase.firebase.messaging.RNFirebaseMessagingPackage; //<-- Add this line
import io.invertase.firebase.notifications.RNFirebaseNotificationsPackage; //<-- Add this line

public class MainApplication extends Application implements ReactApplication {

  private final ReactNativeHost mReactNativeHost = new ReactNativeHost(this) {

    @Override
    protected List<ReactPackage> getPackages() {
      return Arrays.<ReactPackage>asList(
          new MainReactPackage(),
          new RNDeviceInfo(),
          new RNFirebasePackage(), //<-- Add this line
          new RNFirebaseMessagingPackage(), //<-- Add this line
          new RNFirebaseNotificationsPackage() //<-- Add this line
      );
    }
  };
  //..
}
In AndroidManifest.xml we are going to integrate the following block of code:
<application
  ...
  ...
  android:appComponentFactory="androidx"
  tools:replace="android:appComponentFactory">
  <!-- Manage AndroidX changes with these two lines added at the end of the application tag-->

  <!-- [START firebase_service] -->
  <service android:name="io.invertase.firebase.messaging.RNFirebaseMessagingService">
    <intent-filter>
      <action android:name="com.google.firebase.MESSAGING_EVENT" />
    </intent-filter>
  </service>
  <!-- [END firebase_service] -->

</application>
We also need to add a line to the manifest tag at the top level of the AndroidManifest.xml file. It should look like the following:
In your app level build.gradle make sure the following dependencides have been added:
dependencies {
    implementation project(':react-native-device-info') //<-- Add this line
    implementation project(':react-native-firebase') //<-- Add this line

    implementation fileTree(dir: "libs", include: ["*.jar"])
    implementation "com.android.support:appcompat-v7:${rootProject.ext.supportLibVersion}"
    implementation "com.facebook.react:react-native:+"  // From node_modules
    implementation "com.google.android.gms:play-services-base:15.0.90" //<-- Add this line - changed this from 16.1.0 to match dev device level.
    implementation 'com.google.firebase:firebase-core:17.0.0' //<-- Add this line if not already there
    implementation 'com.google.firebase:firebase-messaging:19.0.1' //<-- Add this line if not already there
}
In your android settings.gradle file include the following projects so that they compile and are included:
rootProject.name = 'FCMAndroidTest'

include ':react-native-device-info'
project(':react-native-device-info').projectDir = new File(rootProject.projectDir, '../node_modules/react-native-device-info/android')
include ':react-native-firebase'
project(':react-native-firebase').projectDir = new File(rootProject.projectDir, '../node_modules/react-native-firebase/android')

include ':app'
In your android build.gradle file include the following dependencies or make certain they are already there at the version noted in the code or higher.
At this point save all the files and attempt a compile. If you get a bunch of errors from the react-native-firebase class then you will need to setup the custom Jetifier scripts in the next section.
Fixing what Google broke with AndroidX
With Google’s recent change to their android libraries a significant amount of included libraries have changed path and this impacts a significant amount of React Native libraries. The fix is to use googles Jetifier along with some custom scripts. This portion of this article draws heavily from this article from Medium.
In a nutshell, this change to AndroidX deprecated a lot of libraries and their naming schema changed from import android.support.annotation.*; to import androidx.annotation.*; because the classes have all been moved around. Here is a map of all the changes that were made:
Google expected this would be a problem and released a tool called jetifier.
This tool works great, except for React Native because not all of our dependencies are native. It won’t resolve indirect dependencies nor will it correct code written by us. Several of the changes to support AndroidX were already integrated into the previous section but we need to check that your gradle-wrapper.properties is showing a distribution later than 5.1.1 for gradle. Ours looked like this:
Now we are going to install the latest jetifier tool to support this. You will need to run the following commands:
npm install -g npx
yarn add jetifier
Now, run jetifier to fix the code as per the npm jetifier documentation
npx jetify
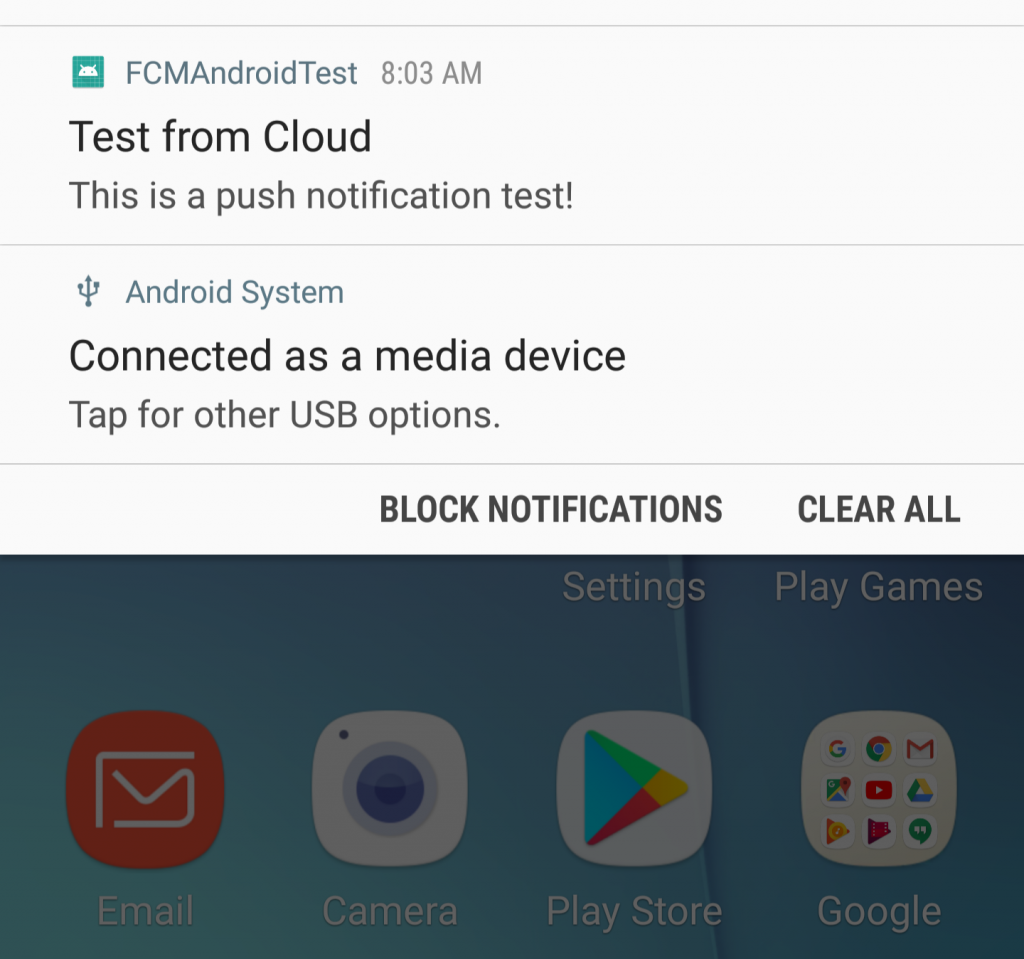
That should have fixed any of the inconsistencies in the code and allowed you to run your React Native app. Finally, we can send our first test message! Open up your Firebase console and select Cloud Messaging in the left menu. Then you can click on Send your first message.
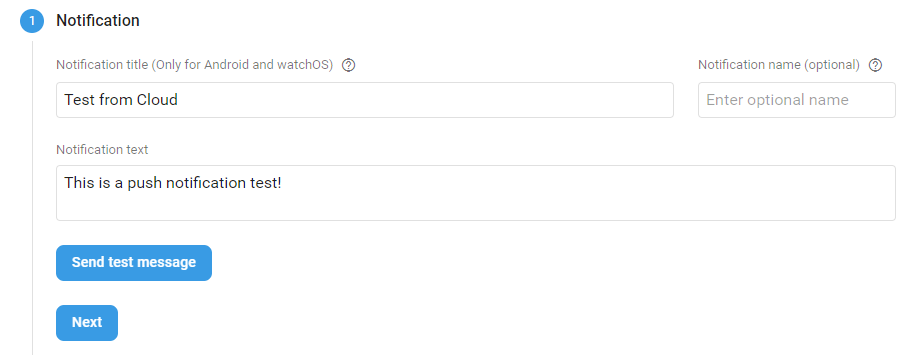
Setup a new Notification by walking through the Compose notification interface.
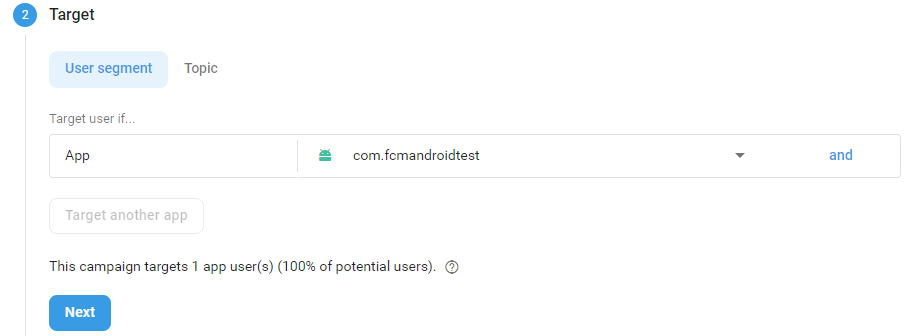
Select the target, since we haven’t done anything with device tokens yet we simply send a notification to the App as the target
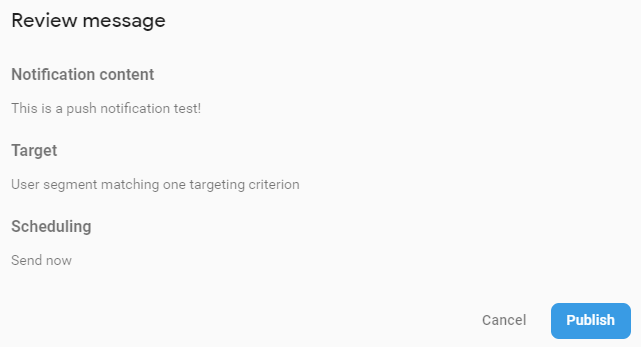
Schedule the notification for Now, and skip through the optional parts and hit review.
You will be met with the Review message dialog, hit Publish and our message should be send to our app.
Test notification sent!
Congratulations! We have successfully sent our first test notification. Right now we can’t really do anything with them other than display them on the screen. In our next article we will setup some handlers to do things with these notifications.
Now that we have our new WSL only development environment in VSCode we can extend our developers environment to support a Google Cloud Platform back-end. The side project I am working on is hosted in GCP so it’s natural to extend our environment to support this. In another article we will create a React Native application to listen for Firebase Cloud Messages in GCP.
This deployment follows the instructions located on GCP’s website linked here for the latest version:
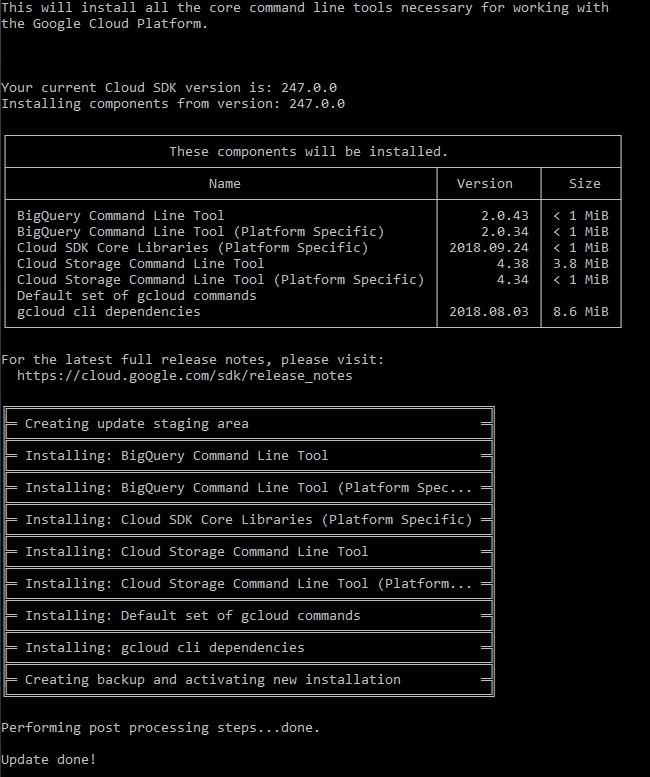
That command executes a full installation of the Google Cloud SDK, I tried the apt-get install first but it wound up not working as it couldn’t find certain packages in the repository. First thing the script will ask you for is the base directory for your package installation, which in my case I chose the default /home/<username>
That means from now on, your most recent version of the Google Cloud SDK files will be located in:
/home/<username>/google-cloud-sdk
This doesn’t exactly match where our React Native project files will be or the location of our android SDK path. So it’s important to note. It makes sense to install here however as the SDK tools are really only for your specific project and the specific cloud access you need.
The script then proceeds to download all the appropriate files and code, asks if you want to contribute your anonymous data for error reporting and then kicks off the install.
Once the installation is complete the installer will ask if you would like your PATH modified to enable shell command completion, I recommend this.
Accept the default file for this if it is your current .rc file and then restart your WSL instance.
You should be good to go now! You can test it out in a new project folder by typing:
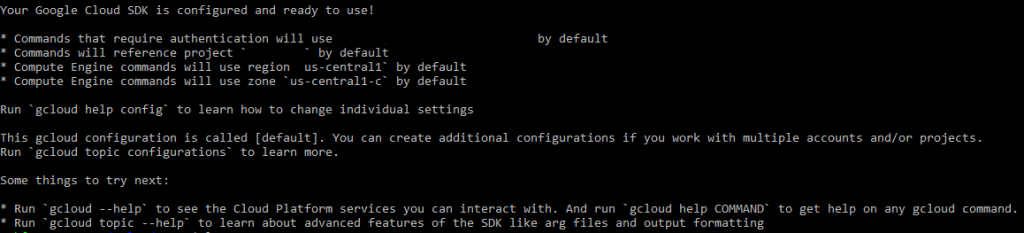
gcloud init
The script will take you through several steps to link your SDK to google cloud platform, including authenticating to your GCP account, what cloud project you are using and what default compute engine zone you would like to use. Once that is complete you should get a message similar to this:
Congratulations, you are now linked to Google Cloud Platform!
I have been working on a lot of side projects lately. My latest thing I am going to be working on is a React Native app with push notifications using Google Cloud’s Firebase Cloud Messaging.
Before I do anything with that though, I need to get my development environment going. I have been using VSCode for a while now with Arduino and for some Python work on Rapsberry Pi so I would like to stick to using that. I also want to use Windows Subsystem for Linux since this has basically been the best thing that has happened to Windows in a long time.
Install WSL
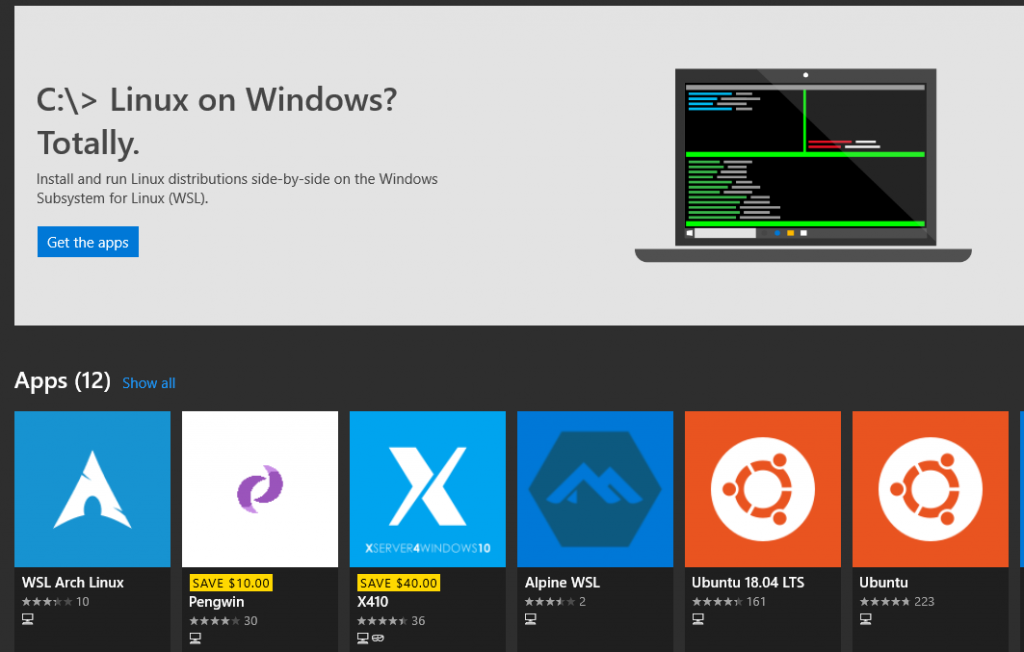
First thing you need to do is install Windows Subsystem for Linux following the instructions from Microsoft:
Pick whatever flavor of linux you want from the Microsoft Store, I chose Ubuntu LTS because I like Ubuntu, it’s very well documented and long term support helps with consistency over time.
After you have installed it launch it for the first time and complete the setup as instructed. After that you should do a full update. Get a coffee while that happens…
sudo apt-get update
sudo apt-get upgrade
Install VSCode
After the installation is complete time to install VSCode. You can get that directly from Microsoft:
After we have installed VSCode, launch it for the first time. You might get some errors, ignore them for now. A nice but somewhat unknown feature about VSCode with WSL is that if you run VSCode from within WSL (with the command “code”) it will actually launch the native Windows executable.
You will also want to install the VSCode Remote Development extension pack from Microsoft. This pack will let your VSCode directly integrate with the files in WSL without confusing their format with Windows format for files.
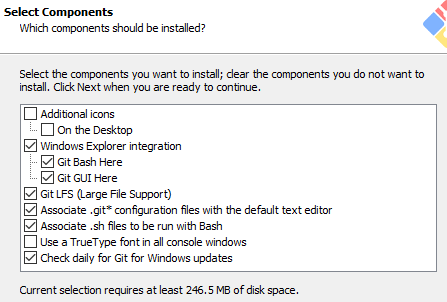
Install Git for Windows
Since we want to work with source control on this project (as there will be a lot of moving parts) we need to install Git for windows.
Use git from the command line and also from 3rd-party-software
Use OpenSSH (comes with Git)
Use the OpenSSL library
Checkout as-is, commit Unix-style line endings (allows WSL to work properly)
Use Windows’ default console window.
Enable file system caching
Enable Git Credential Manager
Configure VSCode for Bash and Git compatibility
Once the installation is complete, launch VSCode and open your settings.json file. Add the following line to change your integrated terminal from Powershell to native Bash:
Restart VSCode and open the termianl bash should launch as your native shell. An important thing to note is, your bash prompt should look something like this:
<username>@<hostname>:/mnt/c/Users/<winusername>
This is a critical change to understand, when you are dealing with paths in windows they look like this:
C:\Users\<winusername>\
But that translates into this:
/mnt/c/Users/<winusername>$
This is your mounted C drive. So if you are keeping your files in:
C:\Users\Dude\Documents\Project1
You get to that folder by:
cd /mnt/c/Users/Dude/Documents/Project1
From this directory, I create/clone projects. Then using Bash, I cd into those directories and npm install / bundle install whatever I need. Each subdirectory acts as its own project folder. Each of these can be committed to git or branched/updated differently.
Configure WSL
We installed Git for Windows but we should also add Git into our WSL then we can work in Bash in VSCode and work from within our WSL as well (omit –global and cd to project directory to set this as specific to a project)
The crlf setting is important, it causes Git to change a carriage return line feed to a linux compatible line feed. This makes sure all your code and installations don’t break. It’s important.
Quick reminder of the workflow to build a new git repository (most of this information comes from the simple guide to git)
"From within your new project directory"
git init
"Do some work, add some files"
git add *
git commit -m "Commit message"
Now log into github and create a repository that matches the project folder name you chose for this new project, set it to public or private and initialize with a README if desired. Git will then give you the appropriate commands to upload your repository:
Git will ask for your username and password and then push the code into the github repository.
Now install other tools you need like Python, Node, etc. Since we are working on React Native, we are going to install a couple different tools.
Configure environment for React Native Development
Perform all of these installations in your WSL window not from the native bash shell in VSCode. These instructions are based on the linux installation instructions from React Native’s Facebook github.
Next we install the React Native CLI, installing Node gave us the Node Package Manager npm which allows us to install further versions of Node and Node supporting code. So now we install the React Native CLI
sudo npm install -g react-native-cli
After that we install the default JDK
sudo apt install default-jdk
At the time of writing the latest version of java is 1.8, so you should get the following output from the “java -version” command
openjdk version "1.8.0_212"
OpenJDK Runtime Environment (build 1.8.0_212-8u212-b03-0ubuntu1.16.04.1-b03)
OpenJDK 64-Bit Server VM (build 25.212-b03, mixed mode)
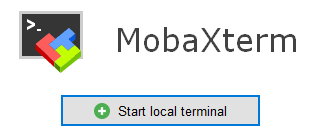
Now to extend the functionality of the WSL we want to install an Xterm system in windows. The one I have tested is MobaXTerm which you can find here:
Download and install the home edition for windows. This will be required to launch any sort of graphical development component from WSL. So depending on your workflow and what you are developing you may or may not need to install this part. Once it is installed you will need to set your DISPLAY variable in WSL.
Navigate to your home director and edit your .profile file. At the end of the file you will want to add the following line:
export DISPLAY=:0
Now save the file and exit your linux and restart it. Now your DISPLAY is exported to the primary display on your workstation and combined with MobaXTerm this will allow graphical users interfaces to launch through your WSL. Your linux subsystem will require some extra files to make that happen though so to do that you should run the following install:
Now we are going to install Android Studio within WSL to give us the full Android tools. You could actually install just the command line tools and packages, but I want to experiment with the whole suite. Download the linux distribution for your version of linux at the follow link
I installed android studio into /usr/local, and because it is a .sh script just adding it to your path won’t work easily. So, going oldschool here and adding a simlink to /usr/local/bin back to it to spoof an executable.
cd /usr/local/bin
sudo ln -s /usr/local/android-studio/bin/studio.sh studio
(May 20, 2019 – Unfortunately KVM on WSL still isn’t possible. I will keep trying this in the future. I have left this part of the documentation in for that time, but you can jump ahead to Build your first Application. Might try Vagrant as well and use it within WSL to push to external KVM server https://char.gd/blog/2017/how-to-set-up-the-perfect-modern-dev-environment-on-windowsWSL 2 will fix this issue.)
We will probably want to install KVM for increased performance as per Android Studio’s recommendations. For our version of Ubuntu the instructions are below:
Once the installation is complete, we need let Ubuntu know that you are going to share your Ethernet connection using a bridge. This will require discovering which ethX interface you are using for your primary network. Run a “ifconfig -a” and find the ethX entry with the same IP as your primary network connection in Windows. Once you have found that, edit your /etc/network/interfaces file and add the following lines (our example uses eth1):
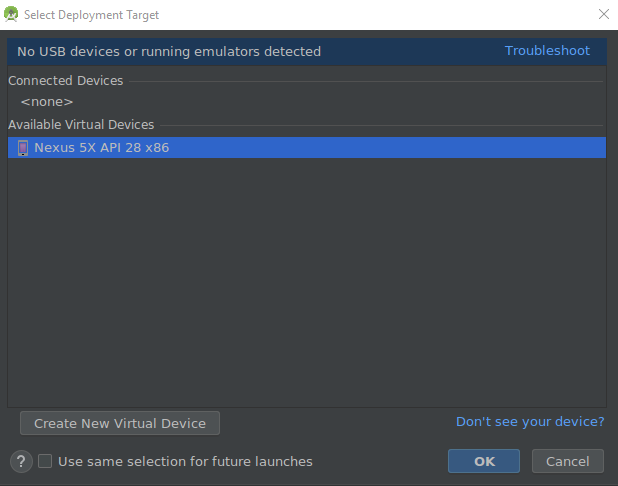
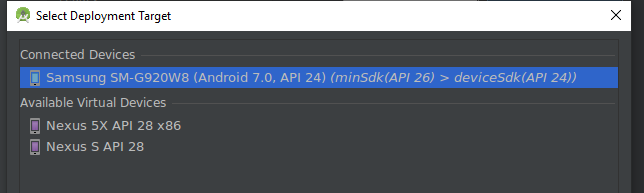
Once you have walked through the install Android Studio will launch for the first time. Create a new basic application and open it. That will cause Android Studio to download and install the latest version of gradle and integrate it with your development environment. Once that is complete it will complete a build of your test application. After that you can setup a physical deployment target for testing. This is a bit tricky!
As you can see above, no connected devices are showing. You can get this to work but in a non-intuitive way. To connect to a physical device android studio relies on Android Debug Bridge (adb) and the version of adb needs to exactly match in both WSL and in Windows.
You can check the version in both shells using the command “adb version”. It might not work immediately in powershell and you may have to add it to your path. What you will likely find is that the version in your powershell and the one in WSL are not the same. They need to be the exact same version.
My Linux version was not the latest and the package installed through apt-get universe was not the latest, so I had to manually install the latest and change those executables in /usr/local/bin
At this point my Linux version of adb was reporting 1.0.41
I wound up having to install the package manager Chocolatey https://chocolatey.org/ and using that to manage the versions of ADB in powershell. This command installed Chocolatey from within an Administrator Powershell
Set-ExecutionPolicy Bypass -Scope Process -Force; iex ((New-Object System.Net.WebClient).DownloadString('https://chocolatey.org/install.ps1'))
Then I restarted my powershell and installed the correct (latest) version of adb using this command:
choco uninstall adb
choco install adb
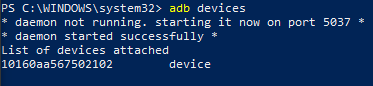
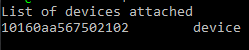
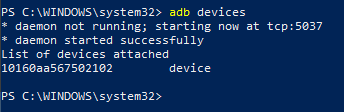
Once those versions match, you can shut down the adb server in WSL using the command “adb kill-server” and you can start the adb server in powershell by calling “adb devices” Which should list your attached android device (as long as Developer tools are unlocked and you have allowed access on the Android device). If you run the adb version command in WSL you should see the exact same output for your device.
Now you can compile and run your app in Android studio to the connected device. I will keep trying to make WSL work but this is a reasonable way to test using WSL as your entire development environment.
Interestingly, the windows native BASH shell in VSCode inherits all the configuration we have done above too. That means, from within VSCode you can launch android studio from the terminal, you can use react native cli, manage all your source through Git, and you can use any other linux subsystem tools that you install, all through VSCode.
Configure to build React Native Applications.
First thing we should do is install a couple supporting packages. Specifically yarn (execute these lines, 1 at a time):
Once these variables have been added you can execute “source $HOME/.profile” and “echo $PATH” to verify the variables have been added to your executable environment.
Creating your first React Native app
Now that everything is set up you can move into your development directory and start a brand new project by typing the following command:
react-native init <Project Name Here>
This will kick off creation of a project folder and the automated download of all required libraries etc. There may be warnings about core packages being out of date or missing dependencies. These appear to be safely ignored (I might learn otherwise as I start building more react native apps!).
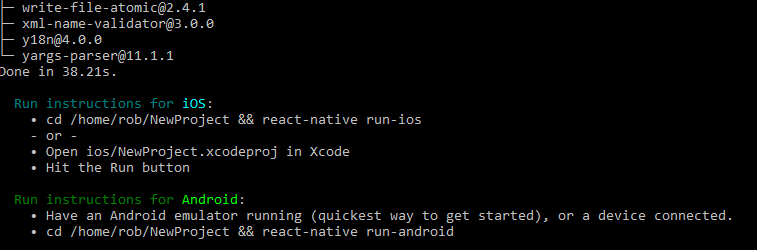
Assuming that everything installed correctly and your test device is properly connected and visible from Android Studio as shown earlier you can now execute your react native project with the following commands.
cd NewProject
react-native run-android
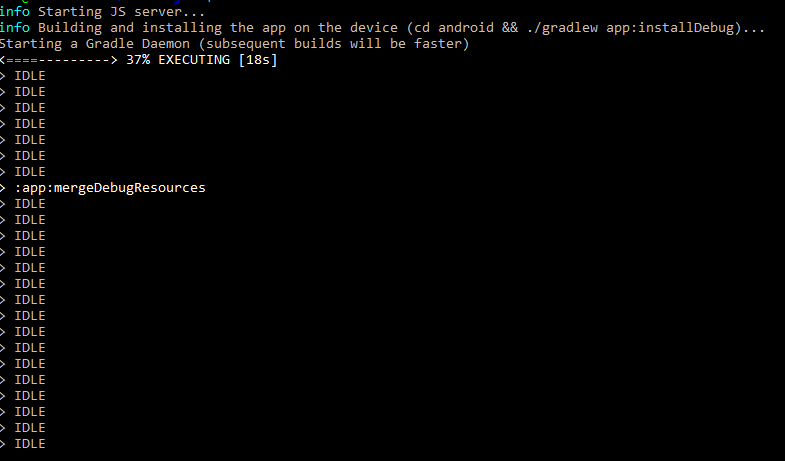
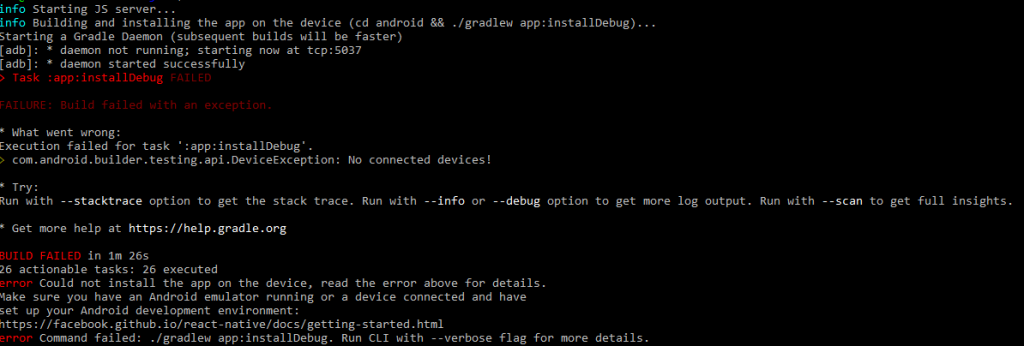
This should fire up a JS server, kick off a multi-threaded build, the first time it may take a while, after it is fast.
If the build fails, make certain ADB in PowerShell is running the daemon for USB devices and not the one in WSL.
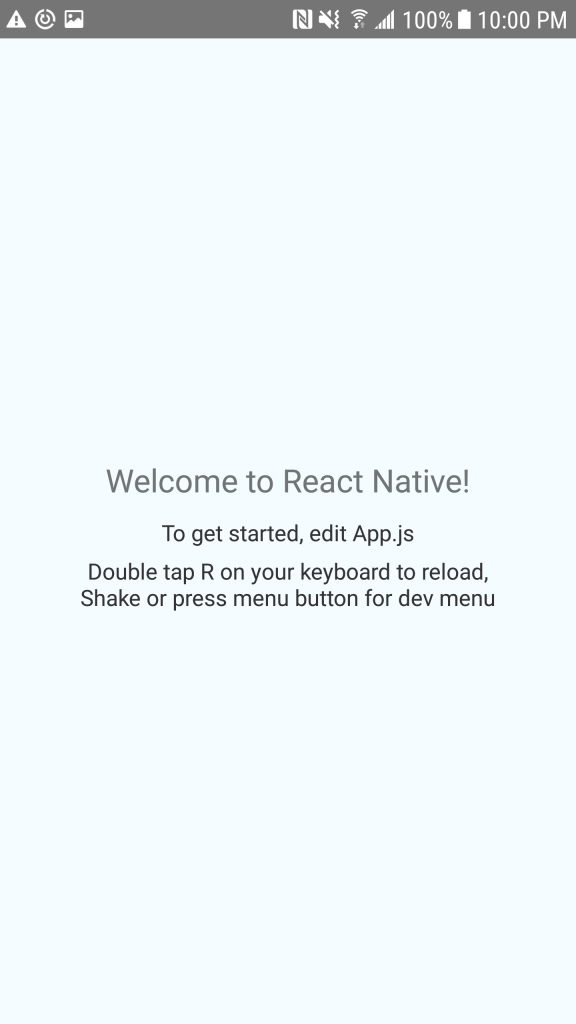
Once that is corrected, run the react-native run-android command again. This time you should be greeted with (If it returns to a prompt, the app won’t run properly, RN should be running in the shell):
And on your device:
Congratulations! You have just built your very first application in React Native on WSL using VSCode for all your development. Now go drink a stiff drink, that was a lot of work.
Well, Automatons Adrift is finally back after a malicious hacking by… someone. In any case, I was able to recover all of the posts and I am going through doing some updates and changing things up making everything a little more informative and colorful!
Virtually every electronic device around has one of these and the technology hasn’t changed substantially in decades.
Batteries.
From your cell phone, to your tv remote, your car to your laptop, they all have batteries. One of the more common types now seen is the lithium ion battery. It works by moving lithium ions around between an anode and a cathode. This is the same process that every other battery follows. Depending on how many ions your anode can store, you can store more charge in the battery.
Now what if you could increase the capacity of your anode by 1000%. Your laptop would could run for 10 hours on a single charge, your iphone could keep going for 8 or 9 days instead of 1, your electric car could have ten times the range all on a single charge.
Researchers in South Korea have made this a reality. Li-ion batteries with 1000% increase in storage! Their system works by increasing the surface area of the anode by making it extremely porous. Like a sponge holds water, the anode can hold exceptionally more lithium ions allowing for a much more substantial stored charge.
Consider the possibilities this holds for nanotechnology. Right now scientists are constructing tiny devices but the restricting factor is the battery, it can’t hold a charge for the tiny device to function for any length of time. This increase could allow a 5 minute charge to last hours or to provide the power to become far more effective. Wireless sensor networks restrict broadcast functions as much as possible because they are cost expensive. This would allow those nets to function much more effectively.
That is just one application. Now that they know this can be done, the race will be on to make even more capable anodes, we could be on the virge of a battery revolution, something that has been a long time coming.
Ok, well not really the evolution of time in the sense that time is everwhere in the universe and is an innate feature of it. Instead this video shows the evolution of a clock. It is a very elegant representation of how a genetic algorithm can evolve surprising and different solutions to a problem. For anyone that doesn’t really understand genetic algorithms this video can give you a feel for how they work. It is quite exciting to see a solution evolve from a simple program.
This video actually comments on the long standing debate between creationism vs evolution. I do not wish to comment on that debate, I simply want to educate on the use of evolutionary algorithms. We can leave creationism vs evolution to those who enjoy the debate. If you would like to jump ahead to the beginning of the experiment go to 1:34 in the video.
Achieving a scientific discovery has been the sole domain of humans for quite some time. However, artificial intelligence is starting to catch up. Enter “Adam” an artificially intelligent robot with the tools to analyze biological data, formulate a novel hypothesis about that data, derive a set of tests to verify the hypothesis and then carry out those tests, and present conclusions from the data!
Adam’s repeated experiments resulted in the system identifying a few unknown genes in baker’s yeast that work together to form an orphan enzyme, this relationship was not previously known and Adam independently identified it.
Tools like this can allow human researchers to think at even higher levels, theorizing about broad spectrum experiments and leaving the systems to explore the frontier for them.
Doing a little technical work with Automatons Adrift right now. I just upgraded the wordpress to 2.7.1. I might even change the theme. Though if I can’t find something I really like I will probably alter the code of this theme instead.
Right now we have resistors, capacitors, and incutors we also have four basic circuit variables current, voltage, charge and flux. I am not an engineer but my understanding is, that with these variables you should be able to have four different components and not just three. The fourth component known as a memristor was first theorized in 1971 by Leon Chua. This theoretical fouth component would have properties that were not reproducable by the other three components alone or in any combination.
Both New Scientist and an even more mainstream magazine Maximum PC have reported on the memristor. This component is simply that big a breakthrough!
The memristor is indeed different from its brothers. When a charge is passed through the circuit in one direction its resistance increases, when it is passed through the other direction it decreases. This amount of resistance is analog as well. This means a memristor can store values that don’t just equate to one or zero although their first use will probably be to make solid state memory that is faster than any memory that already exists and has a data density greater than a factor of ten from todays solid state memory like flash memory. It is much less volatile than flash memory as well so it will last longer, and the state of the memristor can be read using similar techniques to todays memory cirtuits so it it doesn’t require any fundamental changes to underlying hardware.
Since memristors can store large amounts of data in such a small area they are perfect for memory components in nanoscale machines, the ultimate new automata of the future. They can also double as processor components that are dynamically changed as needed. So not only can the memristor function as a memory it can be made to function as a processor as well.
Memristors due to their analog nature function very similarly to human neural networks. The memristor can retain data from reinforcement learning very easily, a few hundred memristors can simulate a full human neuron in a similar amount of space.
Memristors are truly an amazing breakthrough and could lead to a paradigm shift in toadys technology.


 Researchers in South Korea have made this a reality.